Showing posts with label Vegetarian. Show all posts

Wednesday, June 20, 2012

Quinoa for breakfast- with cherries on top!

Feeling the need to switch it up for breakfast lately. I usually rotate between eggs & wheat toast and oatmeal & yogurt. Love 'em both, but needing some more variety! I've had this recipe saved for months and figured I'd give it a whirl. Plus, it's cherry season, so I've got to take advantage! (2 lbs of cherries for 3 Euro!) At first I thought the ricotta might be a little weird on quinoa (and for breakfast) but turns out it was just the right touch! A Greek yogurt (or other thick yogurt) would probably work just as well, too.

I ended up changing it significantly so I could use what I already had- feel free to change it yourself! I'd love to hear what kind of combos you all come up with. Here's what I did:


Breakfast Quinoa with Ricotta and Cherries
Serves 4

Ingredients
  • 1 cup uncooked quinoa
  • 2 cups water
  • 1 Tbs oil ( I used coconut; any could be used)
  • 1/4 cup walnuts, coarsely chopped
  • 1/2 cup dried dates, or other dried fruit (such as raisins or chopped apricots)
  • 2 Tbs pure maple syrup
  • 1/2 tsp orange zest
  • 1/2 tsp ground cinnamon, plus more for sprinkling
  • 1/4 cup ricotta cheese (full fat recommended!)
  • 1 cup fresh cherries, pitted and halved (you could also use other berries, but then you'd have to change the name of the recipe ;)
Directions

1. Cook quinoa according to package directions. Fluff with a fork then set aside.

2. In a large skillet, heat the oil. Add  walnuts and cook over low heat for about 2 minutes, being careful not to burn them. Add the dates, maple syrup, orange zest and cinnamon and stir until heated through.

3. Add the quinoa to the skillet and gently stir to make sure the nut/fruit mixture is well distributed.

4. Each serving is one generous cup of quinoa mixture, topped with 1 Tbs ricotta and 1/4 cup cherries.  Sprinkle with more cinnamon if desired.

*I made this ahead of time and topped with ricotta and cherries just before serving. Each serving is approx. 350 calories (and worth every one!)

**Recipe adapted from Food & Wine. Check it out here.

Thursday, February 23, 2012

3 Minute Hummus

I loooove chickpeas. I add them to everything (within reason. Unlike pumpkin). And pureed, they make the creamiest most perfect condiment! I've been experimenting with different flavoring combos, and this one seems to please both the Mr. and me. It's pretty basic, but honestly, most hummus recipes are. This one just happens to be my variation.

Note: I don't use tahini (sesame seed oil) because I think olive oil does the trick by itself, but feel free to add a tablespoon or too, and decrease the bean liquid. By using the bean liquid instead of more oil, you save on several hundred calories!

3 Minute Hummus

1 15-ounce can chickpeas (garbanzo beans), drained,  with 1/4 cup liquid reserved
3 Tbs olive oil
1 clove garlic (or 1/2 tsp jarred minced)
Juice from 1/2 a lemon
1 tsp ground cumin
1/4 tsp paprika
scant 1/8 tsp ground red pepper (cayenne)
salt to taste

In a food processor, puree the chickpeas with all ingredients besides 2 Tbs of the reserved liquid. Add more liquid until desired consistency is reached. (I usually use it all!).

Makes 1 1/2 cups (24 Tbs)
Serving Size: 2 Tbs

Per serving: ~60 calories (can't beat that!)


My favorite way to use hummus is as a sandwich spread...what's yours?

Friday, February 17, 2012

Accidental Veggie Lo Mein

This meal wasn't supposed to be vegetarian, but thanks to spoiled chicken it turned out that way, so I thought I'd share (in case anyone thought I wasn't keeping to my 1 or more vegetarian meals per week!). It was still yummy even without the chicken, but it did lack a plant protein to replace the chicken. I'd have added some tofu or edamame, perhaps, if I had some; or included a side dish with some protein..or maybe just drink a big glass of milk! Regardless, it was delish. You'll see it can be quite adaptable to accomodate your favorite vegetables. I used what I had on hand, and it turned out to be an excellent opportunity to increase the veggies!


Vegetable Lo Mein
(adapted from The Newlywed Cookbook by Robin Miller)

Ingredients:
12 oz whole wheat thin spaghetti (can use any thin noodle)
1 Tbs + 1tsp sesame oil
2 cloves garlic, minced
1/2 tsp ground ginger
2 celery stalks, sliced
1 large carrot, halved lengthwise and sliced (about 2/3 cup)
1 red bell pepper, thinly sliced
1 heaping cup sliced mushrooms
2 cups sugar snap peas, ends trimmed
1 cup chicken broth (reduced sodium)
1 Tbs corn starch
2-3 Tbs soy sauce (red. sodium
1/4 tsp salt
1/2 tsp crushed red pepper flakes (has some kick, use 1/4 tsp if you don't care for spicy!)
1/2 cup chopped green onions (optional)

1. Cook pasta according to package instructions. Drain and set aside. Transfer to serving bowl and cover with foil to keep warm. (You can drizzle with a small amount of sesame oil to keep noodles from sticking too much.)

2. Meanwhile, heat oil in large non-stick skillet over medium heat. Add garlic, celery and carrot and saute for two minutes. Add peppers and mushrooms and saute an additional 4-5 minutes. Vegetables should be crisp tender and not mushy. Finally add snap peas and saute 2 more minutes.

3. Dissolve cornstarch in broth. Mix in ground ginger, salt and red pepper flakes. Add mixture to skillet along with 2 Tbs soy sauce. Simmer 2 minutes, or until sauce thickens, stirring constantly.

4. Pour mixture over noodles, add green onions, and toss to combine.

Serves 4

Thursday, February 16, 2012

Itchin' Kitchen

We're having a late winter here in Italy. We had a relatively warm and dry November-January, but now that February is here, we are getting cold, WIND, and even a little snow. Maybe it's the Florida girl in me, but shouldn't we be nearing beach season? Regardless of the weather, our kitchen has been itchin' for springtime. My desire for the savory, warm meals of the winter has faded into craving fresh, simple meals. I'm ready for fresh salads, cherry tomatoes, lemon-infused everything, and yes, even the summer squashes, which I thought I'd never feel the need to eat again. Funny how that works out. By the time a season is over, my palette is ready for the next one, just in time.

Snowy mountains behind our base
When I declared to Chris earlier this week that next week we would be eating clean, simple, healthy meals, he looked at me blank-faced and asked, "isn't that how we eat anyway? We can't eat any healthier!" (Little does he know...). I pondered this and realized that it is perhaps more for my psychological benefit than physical. We do eat pretty healthy, but sometimes I take short-cuts for cost savings. For example, a pound of frozen ground turkey here is $1.25. That is hard to beat, but you have to wonder what's in it. They have organic ground turkey for $5.99, which I have never purchased. So again, for the sake of resetting my clean eating mind-set, that's what we're going to do. And after researching some simple clean recipes, I. am. excited.

I plan to blog as I go, but just to whet your taste buds, you can plan to see:
  • Pan seared chicken with basil strawberry balsamic glaze From my fave clean eating blog:  cleananddelicious.com)
  • Fresh pasta with homemade pesto sauce
  • Vegetable Curry (tofu's debut in the Muñoz household)
  • Bison burgers with avocado
  • either homemade pizza (take 2), or homemade polenta (my current obsession)
That's it. Nothing fancy or extravagant. Just simple healthy foods, minus preservatives and unnecessary ingredients. If you're up for the challenge, please comment or email me anything you try! Also, March is National Nutrition Month, so this can be considered my pre-game warm-up :)

Oh- I almost forgot. My Valentines' Day treat! Chris had class all night so I took the liberty to experiment since it was just me. I made chocolate mousse with avocado instead of cream. I was skeptical at first, but after evaluating several recipes, I was convinced that the texture would be phenomenal without too much sacrifice of flavor. I was right! The smooth, creaminess of the mousse was excellent. I plan to play around with the recipe a little more because I could detect a hint of avocado...and I'm not sure how that would fly around here.


Here's what I did, but feel free to play around until you get the flavor you like.

Chocolate Mousse (with Avocado)
(adapted from cleananddelicious.com)

1 large ripe avocado
5-6 Tbs unsweetened cocoa powder
1/4 cup agave or honey
1 tsp vanilla extract
1/2 cup vanilla almond milk (or any milk)
pinch of salt
whipped cream (optional)
Fresh berries (optional)

1. Cut avocado and scoop out flesh. In food processor (I used Magic Bullet), pulse until broken up and relatively smooth.
2. Add pinch of slat, cocoa powder, agave (or honey), vanilla extract and 1/2 of the milk. Puree until smooth. Make sure you puree long enough to get the whipped, creamy texture. Add more milk as needed, or until you reach desired consistency.
3. Portion into 3 or 4 individual serving dishes and refrigerate for at least an hour. Top with fresh whipped cream and berries, if desired.

*While this is a healthier version of chocolate mouse than the traditional, it's still high in calories. Avocados are full of super healthy fats- great for cholesterol! However, all fats are high in calories, so don't go too crazy!

Tuesday, January 31, 2012

Officially Italian?...Pasta Siciliana says "yes!"

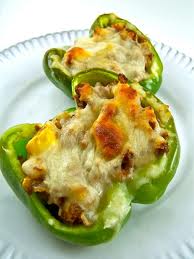
This is not the one I cooked..we gobbled it down too fast. This is the
 restaurant's down the street (i.e my competition)
Have I mentioned I am Italian? Well, only 1/4 Italian if we want to get specific, but it's the largest piece in my cultural-heritage-pie. And since it's the largest, and the only one still actively cultivated in my family, it tends to be a pretty big 25%. (And thanks to my dark hair and Italian-looking mama, people usually don't ask too many questions. My sister on the other hand...) We grew up incorporating Italian traditions into holiday meals and festivities, and Italian cooking was always encouraged. And Italian weddings- don't get me started! If you haven't been to one, you need to get yourself an Italian friend!

Anyway, I just enjoyed a wonderful week-long visit with my former roommate and Resident Expert (RE), who flew all the way to Italy to come hang with me! And if you recall, RE has a pretty restricted diet, so I knew we would be packing meals and eating home-prepared foods daily. It's amazing how much fun you can have in Italy sans pasta and pizza..we were proof! But I admit, after being immersed in Southern Italy for the past week, I was feeling pretty bold and couragous when she left, and that usually leads me straight to the kitchen. Pasta Siciliana was calling my name and I wanted to make it myself. Now, you know I was running on adrenalline because I didn't have a recipe to go by. I just know what's in it: tomatoes, eggplant, olive oil, fresh mozzarrella and beautiful rigatoni pasta. (Here, whenever something is called _____"Siciliana" it means it has an eggplant sauce.)

So armed with my Alice Waters The Art of Simple Food,  a bottle of wine (mostly for cooking, people), and an optimistic attitude, I began. (Chris and I also had the unspoken arrangement that we would be eating eggs and waffles if this plan bombed.) But luckily, it did not. This was, if I may say so, a dish that will give any Italian restaurant a run for their money. It is not, however, something to whip up on a quick night you don't feel like cooking. It took a little time and lots of pans. Here we go:

Pasta Siciliana ala Heather

Ingredients:

1 28-ounce can crushed tomatoes
2 cloves garlic, chopped
1/2 cup extra virgin olive oil (divided)
1/4 cup dry red wine
1/8 tsp red pepper flakes
1/2 tsp dried oregano
1 lb eggplant (1 small)
4 oz fresh mozzarella cheese (the kind packed in water); thinly sliced
12 ounces penne or rigatoni pasta (I used whole wheat)

1. Slice eggplant into 1/4 inch rounds. Salt each side and set in a colander for 20 minutes to extract excess moisture. Then, lay slices on paper towel or clean kitchen towel and blot both sides to remove water. cut rounds into thin strips.

2. Next, heat 1 Tbs olive oil in large saucepan over medium heat. Add garlic and red pepper flakes and cook 1-2 minutes until garlic softens.

3. Add red wine, tomato sauce, and oregeno to the pan. Season with salt and pepper. Bring to a boil. Then, quickly reduce heat to low and simmer, partially covered, for 20-30 minutes. Sauce will thicken and reduce.

4. Meanwhile, in another large skillet, heat 1/4 cup olive oil over medium heat. Once hot, add 1/2 of the eggplant strips. (NOTE: eggplant will almost immediately absorb all the oil in the pan. Don't be alarmed. As they fry, they will release alot of the oil back into the pan. Once about 1/2 the oil is back in the pan, the eggplant should be a nice golden brown and very soft.) Use a slotted spoon to transfer eggplant to a papertowel lined plate.

5. Add remaining oil to the pan and fry the second batch of eggplant. (You may not need to use all the reserved oil..use enough to cover the bottom of the pan about 1/8-1/4 inch.) When finished add eggplant to tomato sauce along with a small amount of the eggplant oil. Gently stir in 1/2 of the mozzarella slices. Cover pot to keep warm while pasta cooks.

6. Cook pasta al dente according to package directions. Once finished, put in a bowl and serve with Siciliana sauce on top. Top with extra cheese slices, if desired.

Garnishing with fresh basil is also recommended..but this kitchen was fresh out :)

Wednesday, September 7, 2011

Beginner Biscotti

3 months into my residence in Italy and I thought it was time to tackle one of my food-related ambitions. If you don't recall, I want to master homemade tomato sauce, drink espresso like an Italian (no milk), and learn how to make biscotti. (For the record, I have tried the espresso and was not a fan on attempt 1, 2, or 3. I decided un cafe macchiato- espresso with a splash of milk- is more my taste). But I'm getting off track...

If you've followed this blog for a while, then you know that baking anything scares me. I can screw up a Betty Crocker cookie mix (which only calls for ONE additional ingredient besides the mix, by the way). But I figure there is no better time to experiment than now, when I have time and willing taste-testers (hence the chocolate zucchini brownies). As irony would have it, my new sister-in-law is a pastry chef(!) so she swiftly sent me a recipe for biscotti. To be honest, as soon as I saw the words "attach paddle blades to mixer" I was intimidated, so instead we'll be attempting that one via skype supervision. Then, I stumbled upon a super simple biscotti recipe in my Newlywed Cookbook by Robin Miller (I highly recommend it for simple classic recipes). This one required all familiar ingredients, and no foreign appliances! Bring on the Peanut Butter Biscotti :)

Peanut Biscotti (by Robin Miller)

2 cups all purpose flour
2/3 cup granulated sugar
3/4 tsp baking soda
1/4 tsp salt
2 eggs
2 egg whites
1/3 cup crunchy peanut butter (I used smooth, and added some nuts)
1 tsp vanilla extract
non-stick cooking spray

1. Preheat oven to 325 degrees
2. In a large bowl, combine flour, sugar, baking soda, and salt. Set aside.
3. In a small bowl, whisk together eggs and egg whites. Whisk in peanut butter and vanilla (I found a fork was helpful!) Add egg mixture to dry ingredients and mix until a manageable dough forms
4. Transfer dough to lightly floured surface and shape into a 10-inch log (eyeball it..my cutting board has inch measurements). Place log on a baking sheet that has been coated with cooking spray.
5. Bake 30-35 minutes, or until knife inserted near center comes out clean.
6. Reduce oven temperature to 300.
7. Allow log to cool for a few minutes (enough to handle) and cut crosswise into 18 slices and arrange slices on baking sheet.


8. Bake 20 more minutes, turning once, until golden. Cool until crisp.

OK..I think I'm ready for intermediate biscotti :)

Wednesday, August 31, 2011

Signature Dish: Tortelloni Primavera with Pesto


Tortelloni Primavera with Basil Pesto

Although I do like the challenge of mastering a new recipe, or attempting a new cooking method- I am a dietitian through and through. The proof? Because no matter what I'm making-  I find myself scheming how I can add a vegetable, reduce the butter, increase the fiber, etc. Even if I don't actually do it, it is my heart's desire to somehow get butternut squash puree into the cookie mix (haven't tried that yet..but it's on my mind!) And I have to say, our return from Tuscany left me culinarily (is that a word?) inspired. I usually experience a new burst of confidence and think, at least for a few days, that I can bump up my cooking level from "super easy" to just "easy." Or sometimes tasting somebody else's simple goodness is just the extra little boost I've needed to convince myself to throw that extra spice in the mix.

Last week,  I was planning to make one of our staple meals from my "super DUPER easy" repertorie of recipes: Tortelloni with Basil Pesto. This is Chris's all-time favorite meal. (Cute sidenote: his mom also informed me it was one of his first meals as a child...if that doesn't foreshadow a high-class-future-eater, I don't know what does!). Not shockingly, our local Italian grocery store has an entire aisle of fresh pastas with every imaginable stuffing so we can be pretty fancy without having to do much. This time we opted for Spinach and Ricotta tortelloni:

And even though our basil plant is thriving, I opted for the pre-made pesto also. I was ready to call it a meal when the dietitian voice said "that's not enough fiber!" So I scoured the fridge to see what I could find, and here's what we had:

  • handful of frozen spinach, (mostly thawed and extra water squeezed out)
  • big handful of frozen green beans
  • 2 medium carrots, peeled and julienned
  • 2 large mushrooms
  • 4 whole sun-dried tomatoes (in oil), chopped
  • 1 can of chick peas, rinsed and drained
Cooking Instructions:

1. Cook 16-20oz tortelloni according to package directions. Tortelloni only takes about 5 minutes.

2. I peeled and prepped the veggies, then heated some olive oil in a skillet over medium heat. I added some of the sun-dried tomato oil to the olive oil for a little extra flavor. I added the carrots first, since they seem to take longer, and sauteed for about 2 mins. Next I added the shrooms, Then threw in the spinach and green beans, and finally the tomatoes. I reduced the heat to medium low and let them all cook together for a few minutes.

3. Add a big spoonful (2 tbs) of basil pesto and stirred all the veggies together together. Season with s&p (if needed). Finally I added  1/2 can of chickpeas to the mixture. Turn off heat but allow to stay on the burner to keep warm until ready to mix with pasta.


4. Drain pasta and put back into pot. Toss gently with pesto of choice (we used a good 1/4 cup)

5. Serve tortelloni in shallow bowls and top with vegetable mixture. Say "Yum!" after the first bite, since you will be pleasantly surprised :)

Serves 4-ish.


Friday, July 1, 2011

A little Garlic goes a long way...

...but a LOT of garlic goes a really long way! Another day at the market and another lesson learned: when the man says 1 kilo of garlic, you get 1 kilo of garlic. That’s right, I came home with about 2 lbs of garlic for the price of 1 Euro! Seemed like a steal until I realized I didn’t know what the heck I was going to do with it all. TGFG (Thank God For Google).

I know garlic is used in everything here in Italy, and I am a-ok with that, but before I walk around breathing garlic fire (or at the very least scare my husband away), I wanted to know: is garlic freeze-able? How can I store it?  If for some reason I can’t manage to use all 4 large heads of garlic, will it be a waste? In the back of my mind I imagine a little Italian old lady chasing me down the street and cursing me for wasting such a jewel, if I were to allow it to go bad before using it all.
Of course I can roast them whole and they are delicious by themselves..but, like I said, I have a lot of garlic. So I sought the help of my cookbook library and came across a Garlic Puree, which can be stirred into things like mashed potatoes or pasta sauces. (Now I just need my Magic Bullet to arrive any day now). Then in my email box today I received a monthly newsletter I subscribe to that had a recipe for Basil and Garlic Tomatoes. What a coincidence, I bought a kilo of cherry tomatoes today also!
All ingredient amounts here are flexible…obviously I increased the garlic J It’s best to let the mixture sit at room temperature for at least an hour to absorb the flavors. Eat by itself, on toasted bread, or as an easy pasta mix-in!  I had planned to drizzle with olive oil right before eating, but it didn't need it!

Basil & Garlic Tomatoes
  • 3 cups quartered cherry tomatoes (or any good tomatoes chopped)
  • 3 cloves garlic, finely chopped (unless you like big chunks- I don’t!)
  • 1 tsp dried basil
  • 1/8 tsp pepper
  • ¼-1/2 tsp salt  
The jury is still out as to whether or not garlic is freeze-able. According to my credible google search, it is possible, but may not keep quality-wise. Oh well. 3 cloves down, 57 to go (there are usually 10-15 cloves in a head, fyi).

Wednesday, April 13, 2011

Everything-but-the-kitchen-sink Stuffed Peppers

Project "Eat through my pantry/freezer/misc-non-perishable foods" is still underway. Tonight was a success because I didn't use a recipe..which makes me feel like a real chef! And for the record, I like anything that is stuffed, or in individualized portions (like the Lovebird Chicken I made a few months ago). I don't know why- there's just something about knowing that it's just for me! Although with my upcoming marriage, I'm thinking dinners will look something like "2 for Chris, 1 for me"..or maybe even "3 for Chris..". The boy can EAT!

So here's what I started with that led to the vision of stuffed peppers: Frozen leftover quinoa, frozen leftover black beans, matchstick carrots, a zucchini, and about a 1/4 c salsa.  I purchased a few additional ingredients and viola! You can really use anything- but I like to use a whole grain as the base and other vegetables on hand. Here's the breakdown:

Ingredients:

2 large bell peppers
1-1.5 c cooked quinoa (or rice or any grain)
1 c black beans
1/2 c shredded carrots (matchstick)
1/2 c shredded zucchini
1 tsp minced garlic
1/4 c salsa
1 tsp cumin
Salt & pepper
1-2oz cheddar cheese
A few dollops of plain Greek yogurt or sour cream (pretty sure dollop is a scientific measurement)

Directions:
1. Preheat oven to 350 degrees. Clean out peppers and cut in half (to make 4 halves total)
2. Mix the quinoa, beans, vegetables, garlic and spices in a bowl. Meanwhile, bring a saucepan of water to a boil. Boil pepper halves for 4-5 minutes.
3. Drain and reserve some cooking water to add to bottom of baking dish. Fill pepper halves with quinoa mixture.
4. Bake uncovered for 25-30 minutes. Then top with a few Tbs of shredded cheese and bake for another 10 minutes.
5. Remove and let cool for a few minutes. Add a big spoonful of Greek yogurt or sour cream before eating.

Makes 4 Half Pepper servings.

*I thought this needed something else...and usually when I say that I mean salt. So taste the mixture before stuffing peppers!

Wednesday, October 27, 2010

Falling in Love with Fall

October is my favorite month of the year- there are so many reasons to celebrate! My birthday (a questionable reason to celebrate), Florida finally reaches less than 90 degrees, and of course the wonderful seasonal food! I would not be surprised if I woke up orange one day from the amount of pumpkin I've been eating. It can be added to everything- oatmeal, cookies, pudding, brown rice, smoothies, sauces...this list goes on. In addition to pumpkin, there's cranberries, pears, butternut and acorn squash and the debut of soup/chili season. I've got more recipes than I can keep up with. A fun one I tried with a friend recently was a butternut squash-apple-cranberry mixture with a little bit of brown sugar and butter. Can you say delicious?

As dietitians, we encourage people to eat from the "rainbow;" meaning the brighter the colors the more nutrient-filled the food (vegetable or fruit). It's true- they are loaded with vitamins, minerals, and other health-boosting, disease fighting nutrients. Fall foods provide such a good opportunity! It's never been more fun to eat healthfully. Baked or poached apples, peaches or pears tossed with seasonal spices like cinnamon and nutmeg make the perfect side dish or dessert. No kidding, my roommate and I have gone through at least 3 bottles of ground cinnamon.


I'll be sad to see all these foods go, but until then I'll experiment all I can. I know it's a little premature for New Years resolutions, but this year I think I'll resolve to eat pumpkin all year long. To whet your taste buds, check out this yummy recipe below-courtesy of Whole Foods of course :) www.wholefoodsmarket.com/recipes/2377.